

How To Remove A Fixed Window Sash
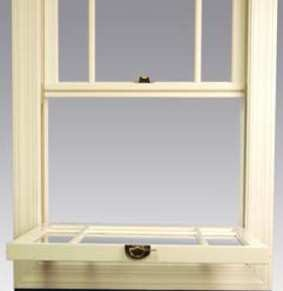
Begin by raising the lesser sash about 4″.
Pull the tilt lever (nested in the sash lock base of operations) until it clicks.
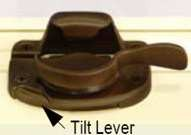
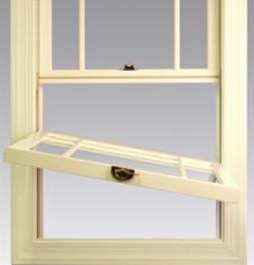
Concord lever until the sash latches clear the unit frame when tilting. Ease top edge of bottom sash out toward you to a horizontal position.
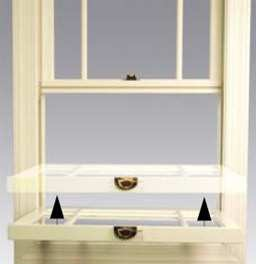
To tilt the top sash, lower the sash about half style. Pull the tilt latches (in the pinnacle edge of sash top rail) simultaneously until they clear unit of measurement frame when tilting. Ease top of sash toward you to a horizontal position.
If you have a single hung window, but the bottom sash is operational. The summit sash is stock-still in the frame, and cannot exist tilted or removed.
Step 2 – Removing the Sash
To remove the sash, tilt the bottom sash using the same technique described in the
Ultimate Double Hung and Single Hung Windows – Tilting the Sash section (above).
When sash is in a horizontal position, elevator both sides of the sash upwardly 2-3″ (raising pin pins out of each clutch).
Now rotate the sash until pin pins articulate the jambs and remove the bottom sash from the frame.
Next, tilt the acme sash using the same technique described in Ultimate Double Hung and Unmarried Hung Windows – Tilting the Sash. When the sash is in a horizontal position, lift both sides upward 2-3″ (raising pivot pins out of each clutch). Finally, rotate the sash until the pivot pins clear the jambs and remove the meridian sash from the frame.
Step 3 – Replacing the Sash
To replace the double hung sash, first hold the top sash in a horizontal position, height rail toward y'all, outside confront.
Sash pivot pins must be placed 2-3″ above the clutch assemblies when relocating in the jamb carrier tracks. Pivot i side of the sash up to enable pivot pins to clear jamb carrier assemblies when aligning sash in tracks, pivot sash back to horizontal (flat) position. Lower sash pivot pins into balance clutch cams.
Check sash pin pins to ensure they are fully engaged in the clutch cams earlier proceeding.
Now, tilt the sash up, pulling the tilt latches until they retract fully on both sides, and hold them while you lot ease the sash into place. Cheque the nose of each tilt latch to ensure information technology is fully engaged in the sash guide rail of jamb carrier associates.
Enhance the elevation sash to the top of frame. Repeat in a higher place procedures for lesser sash, except retract the sash check rails guides with the tilt lever in the sash lock base when installing.
Footstep four – Resetting a Slipped Clutch Assembly
Sometimes when attempting to tilt or remove a sash, the clutch associates that helps lift the sash slips. When this happens, the ii clutches (ane on either side of the window) will no longer be at the same height in the jamb track. The slipped clutch will need to be reset before the sash can be replaced.
Clutches are under farthermost tension. Delight utilise caution when post-obit the directions beneath:
First you will need to raise or lower one clutch so that information technology matches the position of the other. First, decide which clutch you wish to reset. Measure out the other clutch'south distance from the sill on the opposing side and temporarily mark that dimension on the jamb carrier that contains the clutch you lot will reset. (The clutches must be reset so that their respective heights in the jamb carrier organisation are within 1/eight″ of one some other.) This will tell you where the slipped clutch needs to be repositioned.
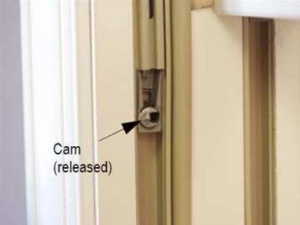
Next, using a apartment screwdriver, rotate the balance clutch cam in the clutch assembly of the slipped clutch to the released position. Clutches are under extreme tension! Concord the screwdriver firmly and slide the slipped clutch to the marker.
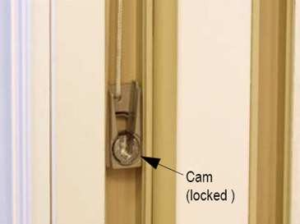
Rotate the residual clutch cam to the open locked position (cam opening up). Release the screwdriver carefully from the clutch assembly (it must lock in place or damage will occur).
Compare clutch heights from the sill for the sash affected. They MUST exist within ane/8" of each other or damage may occur when sash are reinstalled, suit height as needed.
If reading isn't your thing, check out this helpful Youtube video from other website on How to Remove & Replace the Sash. (Credit to: panacheandflair)
What do you think well-nigh this Footstep-by-pace Guide on How to Remove Window Stash? Permit us know if information technology is helpful past leaving a comment below.
Acquire more well-nigh remodeling tips past following our Remodeling blog hither.>>
Source: https://www.castlebri.com/how-to-remove-window-sash-for-cleaning/
Posted by: haleyanswerpose.blogspot.com
0 Response to "How To Remove A Fixed Window Sash"
Post a Comment