

How To Create Virtual Environment In Windows
A Virtual Environment or a "venv" is a Python module that creates a unique environment for each job or project. It installs the packages we need that are unique to that setting while keeping your projects neatly organized. Additionally, venv never actually modifies the system'south default Python versions or modules that are installed on the system. Using venv essentially allows for a unique working environment while avoiding any disruptions to other variants of Python that are used, but not related to our project.
Prerequisites
We recommend enabling the Windows Subsystem for Linux (WSL) in order to take total advantage of all the functionality of venv on Windows 10. This allows you to run a full Linux distribution inside Windows to aid in the functionality of the new dev environment.
Why should I use WSL?
- Many of the tutorials for Python are written for Linux environments.
- Most devs use Linux based packaging/installation tools.
- Using WSL ensures compatibility between development and production environments
How do I enable WSL?
- Get to Start > so search for "Turn Windows features on or off."
- Click the link to open up the Windows control console.
- Next, open the Windows features popular-upward carte du jour.
- Curl downward in that list to locate the "Windows Subsystem for Linux" option and select the checkbox.
- Reboot.
Note:
WSL volition crave you to download a version of Linux noted here.If yous're using Windows (without WSL), simply install Python 3 from the Python website. The venv module is incorporated into that Windows installation.
Install Linux
There are multiple Linux distros that piece of work with WSL. Yous can locate and install them from the Microsoft Store. We recommend starting off with a Ubuntu 18.04 LTS distribution as it's up to engagement, has an splendid back up community, and is well documented.
- To install Ubuntu, click this Ubuntu 18.04 LTS link. This will open the Microsoft store where you lot tin can click on the Get button.
- Once the download has completed, type "Ubuntu xviii.04 LTS" into your Showtime carte du jour.
- Side by side, you'll exist asked to create a username and password every bit it will be your first time using this OS.
- Later, you will now be signed in automatically as the default user.
- Lastly, we'll demand to run an update on the new Bone. You can accomplish this by running:
sudo apt update && sudo apt upgrade As a side note, Windows does not handle upgrades for this Bone then you will demand to ensure Ubuntu stays up to date by running the update and upgrade commands manually.
Yous can so install your distro using PowerShell. To install one of those distros, navigate to the folder which contains the newly downloaded Linux distributions. Once in that folder, run the following command in PowerShell (where app_name.aspx is the name of the distribution file):
Add-AppxPackage .\app_name.appx Next, we'll add together the path to the distro into your Windows surround PATH using Powershell (eg. C:\Users\Admin\Ubuntu)
$userenv = [System.Environment]::GetEnvironmentVariable("Path", "User") [System.Surroundings]::SetEnvironmentVariable("PATH", $userenv + ";C:\Users\Admin\Ubuntu", "User") Now, we tin can start the distro by typing in uubuntu.exe. Next, nosotros should initialize the new example.
Launch a distro
To cease the initialization of your newly installed distro, we will demand to launch a new instance. Y'all tin accomplish this by clicking on the "launch" button in the Microsoft app shop, or by launching the distro's .exe file from the Start menu. Additionally, if using a Windows Server, you can start the distro'southward launcher's executable file (Ubuntu.exe) from the distro's installation folder.
During the last stage of the installation, the distro's files volition be decompressed and stored locally on your PC. This process may accept a few minutes but is merely required once. Afterward initializations should take less than a 2nd.
Setup
There are four bones steps to install a virtual environment on windows:
- Install Python
- Install Pip
- Install VirtualEnv
- Install VirtualEnvWrapper-win
Notation:
Remember, these commands should be run within the WSL Ubuntu environment. Additionally, the sudo command may exist needed if not running as the root user.
Step 1. Install Python
Python iii.eight.0 is the latest major release of Python.
- Annotation: There is now a "web-based" installer for Windows. This installer will download the required software during the installation.
- In that location are too Python redistributable files that contain the Windows builds, which makes it easier to include Python in another software bundle.
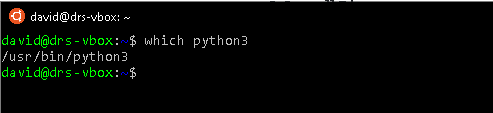
- If you lot installed Ubuntu 18.04 from the above list, Python3 comes pre-installed.
Stride 2. Install PIP
We advise following the directions located here in our knowledge base of operations article regarding installing PIP on Windows. Python3 usually comes with pip preinstalled, however, if you get the error "pip command not plant," simply use the following method to install pip.
curl https://bootstrap.pypa.io/go-pip.py -o become-pip.py - Download become-pip.py, and brand certain you're saving the file to your Desktop.
- At your Windows Command Prompt, navigate to your Desktop and run the become-pip.py script. Later on that, pip should work system-broad
Note:
Yous may need to have administrative privileges at the control prompt to achieve this task. For more info on this, follow the directions from Start a Command Prompt as an Administrator from the Microsoft TechNet website.
cd Desktop Python get-pip.py
Pace three. Install Virtualenv
In your Windows command beat prompt type in:
Start virtualenv
In your windows control prompt, head to your project location:
Once inside the projection folder run:
Activate virtualenv
On Windows, virtualenv (venv) creates a batch file called
\env\Scripts\activate.bat To actuate virtualenv on Windows, and activate the script is in the Scripts folder :
\pathto\env\Scripts\activate Example:
C:\Users\'Username'\venv\Scripts\actuate.bat
Pace 4. Install VirtualEnvWrapper-win
In that location are two main methods we recommend to install this batch script.
- Using pip
pip install virtualenvwrapper-win - Install from source
git clone git://github.com/davidmarble/virtualenvwrapper-win.git We and so cd to the virtualenvwrapper-win folder and run:
And that's it! Python'southward venv is set upwardly and ready to use.
Grab Your Free Coupon Today!
Check out all the specials we take going on right now where yous can salve HUGE on our Dedicated server, Cloud Dedicated server every bit well equally our VPS Servers! Additionally, cheque out the coupon below for even greater savings!!!
Source: https://www.liquidweb.com/kb/how-to-setup-a-python-virtual-environment-on-windows-10/
Posted by: haleyanswerpose.blogspot.com
0 Response to "How To Create Virtual Environment In Windows"
Post a Comment